
A Step-by-Step Guide to Installing Scalable Modular Energy Storage for Your EV Charging Hub
The Real-World Guide to Installing Scalable Energy Storage for Your EV Charging Future
Hey there. Let's grab a coffee and talk about something I've been knee-deep in for the past two decades: getting energy storage systems, especially for EV charging, from a blueprint on a desk to a humming, profitable asset on the ground. Honestly, the excitement around EVs is palpable, but I've seen firsthand on site the cold splash of reality when the grid connection quote arrives, or when a fleet of trucks wants to charge simultaneously at 2 AM. The problem isn't the ambition; it's the infrastructure.
Quick Navigation
- The Real Problem: More Than Just Power Outlets
- Why Scalable Modular Containers Are the Answer
- The Step-by-Step Installation Process
- Key Technical & Business Considerations
The Real Problem: More Than Just Power Outlets
Here's the phenomenon across the US and Europe: a business decides to future-proof with EV chargers. They get the chargers, then they hit the wall. The local utility says a full-power upgrade will cost millions and take 18-36 months. Or, they proceed without storage and get hammered by astronomical demand charges every time multiple vehicles charge. The National Renewable Energy Lab (NREL) notes that uncontrolled EV charging can increase peak demand by up to 25%, a nightmare for local transformers and your operational budget.
The agitation is real. It's not just cost; it's lost opportunity. You can't monetize your chargers if they're throttled by the grid. You can't attract fleet operators without reliable, fast charging. And you certainly can't have a safety incident because the electrical infrastructure was pushed beyond its limits.
Why Scalable Modular Containers Are the Answer
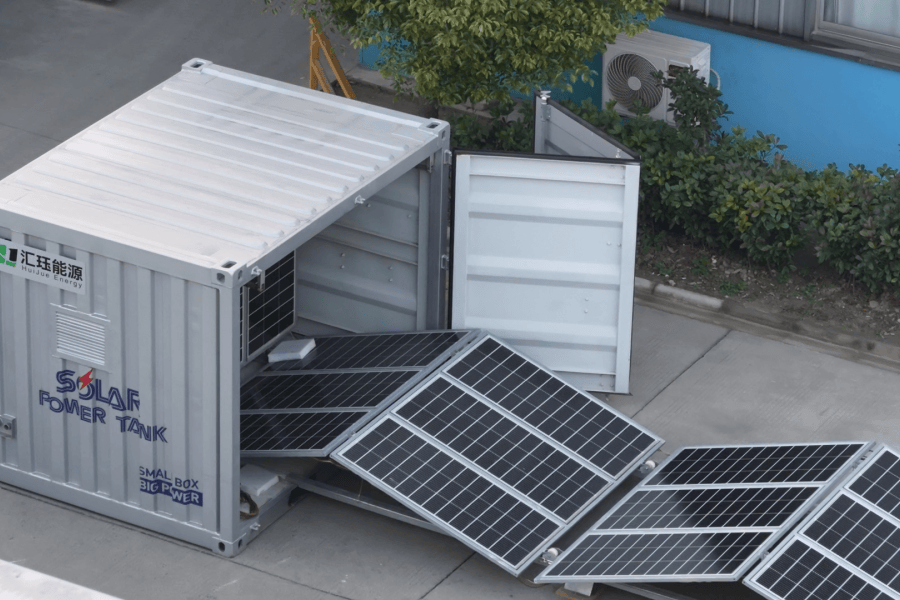
This is where the scalable modular energy storage container shifts from being a "nice-to-have" to the core solution. Think of it as a strategic power buffer. It doesn't just store energy; it manages power flow intelligently. At Highjoule, we've built our systems around this principle: start with what you need today, add modules as your demand grows tomorrow. This approach dramatically cuts upfront capital risk and aligns spending with revenue generation from your chargers.
The beauty is in the standardization. These containers are pre-engineered, pre-tested units that meet stringent UL 9540 and IEC 62933 standards. They arrive on-site largely pre-assembled, which is a game-changer for reducing installation complexity and time.
The Step-by-Step Installation Process (From My Field Notes)
Forget the overly technical manuals. Here's the practical, step-by-step view of how a robust installation actually goes down for a scalable system powering EV charging stations.
Phase 1: Site Prep & Foundation (Weeks 1-2)
This is where most delays happen if not planned right. We're not just pouring a slab. We need a level, reinforced concrete foundation that accounts for local frost lines and seismic ratings (especially in California or parts of Europe). Conduit for power and data cables is laid underground at this stage. I always insist on a site survey myself C what looks good on a map might have a drainage issue or poor soil compaction in reality.
Phase 2: Container Placement & Mechanical Fixing (Day 1)
The container arrives on a flatbed. Using a crane, we position it precisely over the anchor points embedded in the foundation. Bolting it down isn't just about weight; it's about withstanding wind loads and ensuring all connections remain vibration-free. This is a one-day operation if the prep was done right.
Phase 3: Electrical Interconnection (Week 3)
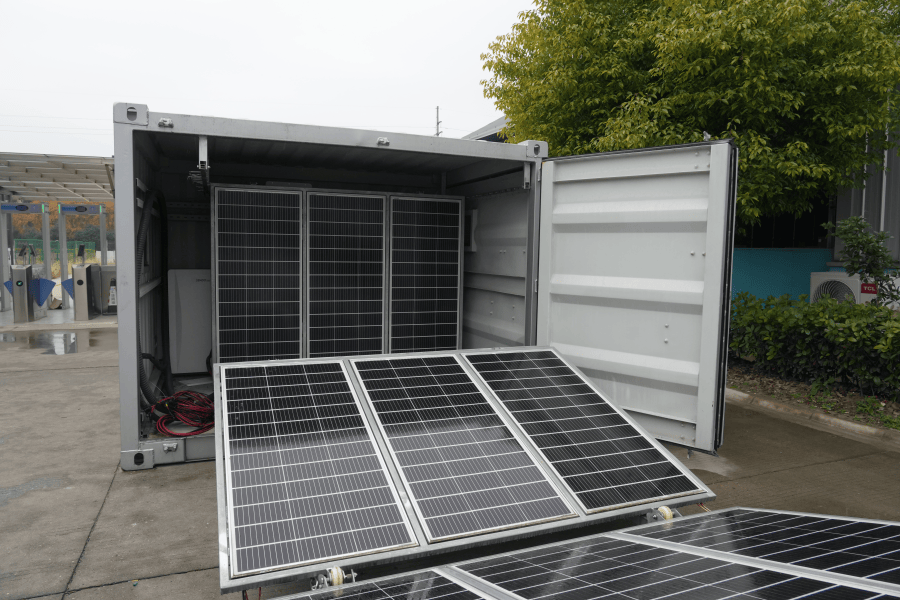
The heart of the operation. Certified electricians connect the container's main output to your facility's electrical panel that feeds the EV chargers. In parallel, we connect to the grid connection point (often a meter or a dedicated transformer). A critical step here is installing the bi-directional inverter system and the energy management system (EMS) brain. The EMS is what tells the batteries when to charge (from the grid or solar), when to discharge to the chargers, and when to sit idle to avoid demand charges.
- AC Coupling: Most common for retrofits. The BESS connects on the AC side of your service panel.
- DC Coupling: More efficient if you're integrating solar PV from scratch, as it avoids multiple DC-AC conversions.
Phase 4: Commissioning & Grid Compliance (Week 4)
This is the "smoke test." We power up the system in a controlled sequence, testing every safety relay, every communication link between the EMS and the chargers, and every thermal management cycle. We simulate grid outages, peak demand events, and charger load spikes. For the utility, we provide certification that the system's grid-interconnection protocols (like IEEE 1547 for anti-islanding) are fully functional. Only after passing this do we get permission to operate.
A Real-World Case: The California Depot
Let me tell you about a logistics depot in the Inland Empire, California. They had 50 electric delivery vans and a grid connection that could only support 10 Level 2 chargers at once. Their challenge was clear: charge all vans overnight without a $500k grid upgrade.
We deployed a 500 kWh modular container from Highjoule, UL 9540 certified, with a scalable architecture. The installation followed the steps above. The EMS was programmed to slowly charge the batteries from the grid during off-peak hours (when rates were low). From 8 PM to 6 AM, the batteries discharged to power all 50 chargers simultaneously, with the grid only providing a small baseload.
The result? They avoided the grid upgrade, cut their energy costs for charging by 35% by leveraging time-of-use rates, and their vans are fully charged every morning. The system paid for itself in under 4 years. The scalability means they can simply add another battery module rack when they expand their fleet.
Key Technical & Business Considerations
As you think about this for your own project, here's my expert insight on a few crucial points:
- C-rate Isn't Just a Spec: It's about speed and longevity. A 1C rate means a 100 kWh battery can discharge 100 kW in one hour. For fast-charging applications, you might need a higher C-rate (like 2C). But honestly, a higher C-rate often stresses the battery more. We design for the sweet spot C enough power for your chargers without unnecessarily degrading the battery's 10+ year lifespan.
- Thermal Management is Safety: This is non-negotiable. A passive air-cooled system might work in Norway; it will fail in Arizona. Our containers use active liquid cooling. It maintains an optimal temperature range, ensuring safety, maximizing performance on hot days, and again, extending life. This is a core part of the Highjoule design philosophy that we've refined over hundreds of deployments.
- Understanding LCOE (Levelized Cost of Energy): Don't just look at the upfront price per kWh of storage. Ask about the LCOE C the total cost of ownership over the system's life, including installation, financing, maintenance, and degradation. A cheaper system with poor thermal management will degrade faster, raising its real LCOE. A modular, well-designed system with a lower LCOE is a better financial asset.
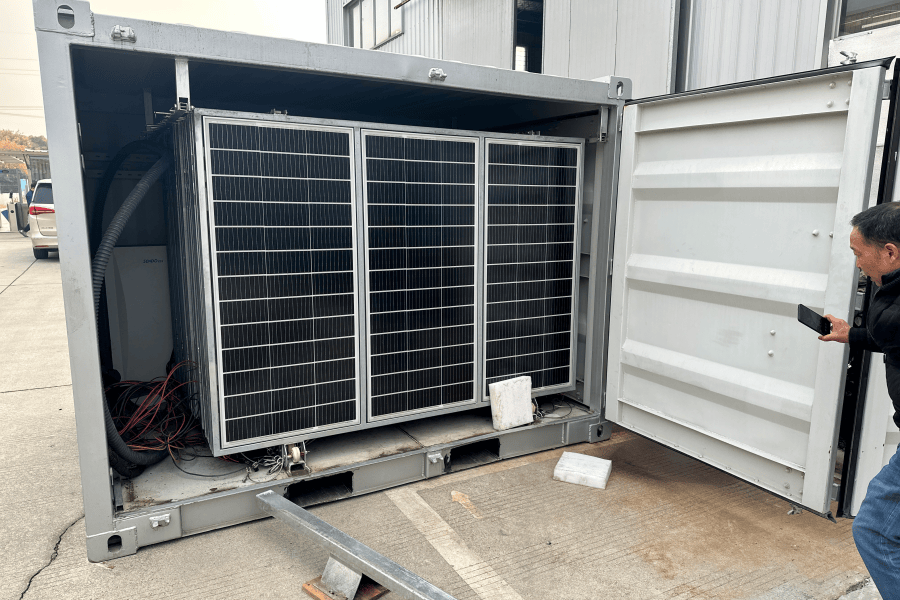
The journey to deploying energy storage for EV charging is part construction project, part financial engineering, and part technical puzzle. But getting the installation process right C choosing a scalable, standardized, and compliant solution C is what transforms a complex challenge into a straightforward, profitable investment. What's the one grid constraint keeping you up at night about your EV plans?
Tags: UL Standard BESS EV Charging Infrastructure Modular Energy Storage Grid Stability
Author
James Zhang
20+ years agricultural energy storage engineer / Highjoule CTO